Halloween is fast approaching and we have teamed up with our favourite crafting expert – Michelle from The Crafty Foxes – to come up with some fantastic ideas that you can make at home or in the classroom. Why not try our Halloween Pumpkin Lantern – simple and easy to do but very effective. Or we have some spooky spider cups, witch bunting and even bat bunting – lots of ideas to keep you busy in the lead up to Halloween!!!
Make 1 – HALLOWEEN PUMPKIN LANTERN
Let’s make a start …. what will you need?
- An old recycled glass jar
- PVA Glue
- Tissue Paper Squares
- Black Paper/Card
OK let’s get crafty ….
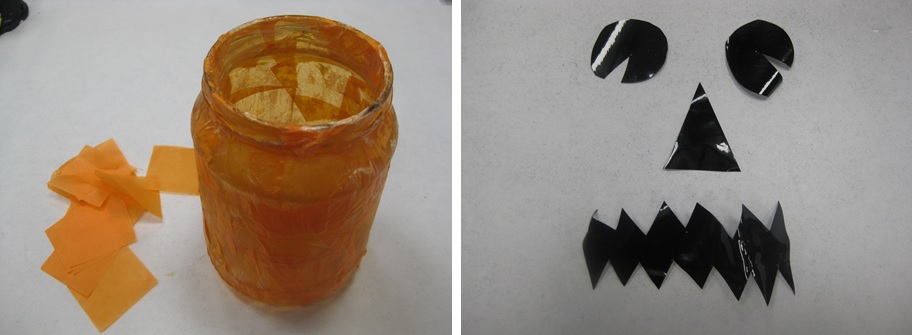
- Start by brushing PVA Glue all over the jar – you don’t need too much just a thin layer
- In your bag of tissue paper squares pick out the nice bright orange ones and stick these tissue paper squares onto the jar so it is completely covered on the outside
- Then leave it to dry – be patient, the longer you can leave it to dry off the better!
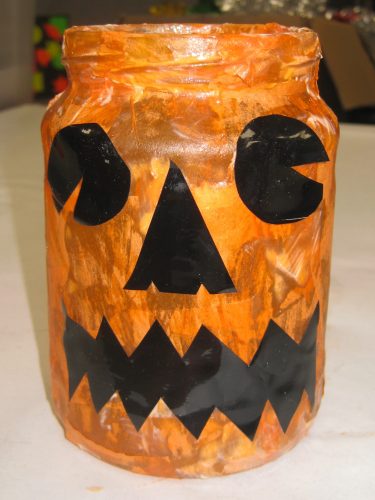
- Next let’s make the scary face by cutting out some eyes, a nose and a mouth from some black paper or card – when you are happy with them, stick them on
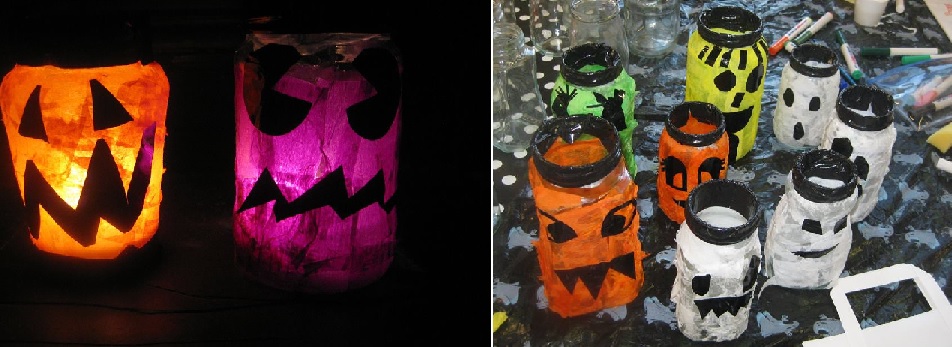
- To get it glowing just add a tea-light or a battery operated light and watch it glow – just perfect for Halloween!
Why not try using some different colours like white for a ghost, or purple and green for monsters:
Make 2 – HALLOWEEN SPIDER CUP
Spider Cup – here’s a list of what you will need:
- A plastic cup or a yoghurt pot
- Black Crepe Paper
- PVA Glue
- Scissors
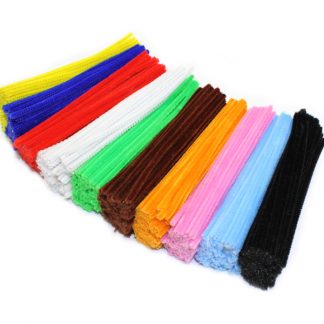
- Craft Stems (8 Black ones and 1 Yellow one for your Spider’s mouth)
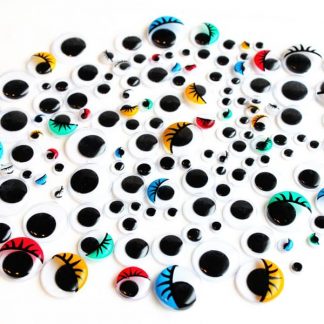
- Wiggly Eyes
We are ready to go – creepy spider cup nearly ready:

- Start by cutting the crepe paper into squares, we have found about the size of a postage stamp is the best size for this crafty project!
- Next spread the PVA Glue all over the cup in a thin layer
- Take your pre-cut crepe paper and stick them all over the cup until it is completely covered – leave it to dry for a while
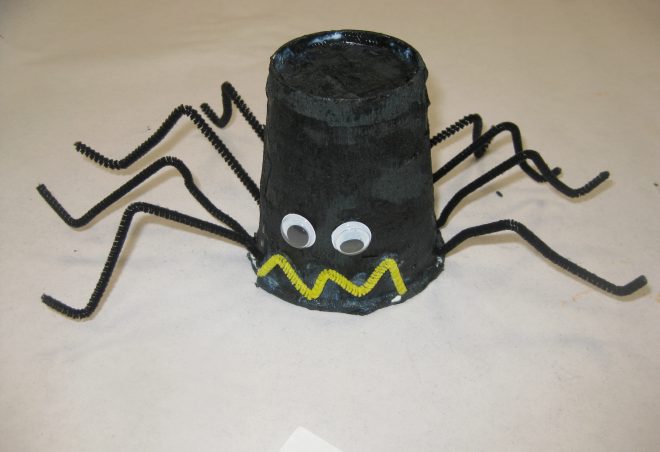
- Add the Wiggly Eyes towards the bottom half of the cup – remember to leave some space for the scary mouth!
- Bend a Craft Stem into the shape of a scary mouth (if it is too long just cut it in half), we have used a yellow one but the choice is yours! – when it is scary enough stick it on your cup
- Next you need to bend the 8 Black Craft Stems into the shape of spiders legs – take a look at our picture above to see exactly what we mean….
- Cut 4 slits on either side of the bottom lid of the cup/yoghurt pot and secure your 8 spider legs into the slits
- All finished …. one Scary Spider Cup ready to spook people on Halloween!!!
Make 3 – HALLOWEEN SPIDER WINDOW DECORATION
This is what you will need:
- Black Paper
- Scissors
- Pencil
- Template printed out – Bright Ideas Halloween – Spider Template
OK let’s make ourselves a halloween spider decoration:
- Start by folding your sheet of black paper in half – we have found folding it vertically gives the best results
- Next fold your template in half along the dotted line
- Line up your edges so that you are against the folded edge and with your pencil draw around the template
- Time to cut out
- Open up and now you have an amazing Spider Window Decoration to display in your window or on a mirror

Make 4 – HALLOWEEN WITCH BUNTING
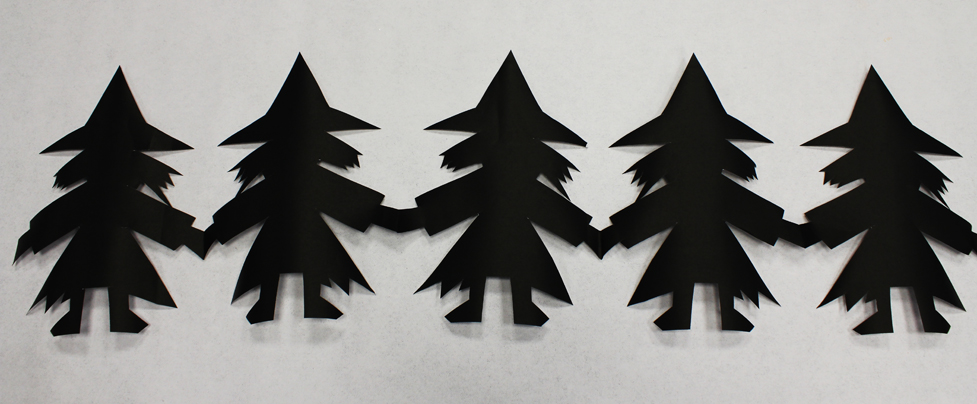
You’ll need:
- Pencil
- Roll of Black Poster Paper
- Scissors
- Template printed out – Bright Ideas Halloween – Witch Template
Here we go, this is what we need to do:
- Start by consertina folding about 3 metres of the Black Poster paper from the roll making each fold approximately the size of an A4 sheet of paper
- Next place the template on the top of the folded poster papers and using your pencil draw around the template
- Time to cut out – make sure that the hands are at the edge of each fold because this is how the garland will stay together
- Now you are ready to open out and hey presto … your witch bunting is ready to hang
- Want to make it unique … why not try decorating each witch differently to make them extra special – try some tissue paper, felt and wiggly eyes – perfect!
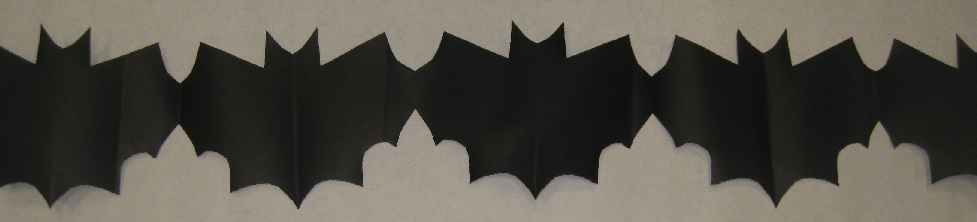
- We have also included a Bat Template – Bright Ideas Halloween – Bat Template – follow the same guidelines as above and you’ll end up with bunting just like ours ….
Until next time, keep crafting!!
The Bright Ideas Team & Michelle from The Crafty Foxes x